Monday 29 June 2015

Log Cabin - Red Sky at Night Quilt


I grew up in a log cabin, did you know? My dad built it off the side of a big old caravan from trees off the farm. It was supposed to be our temporary accommodation while he built our 'real' home. But then he got sick, and money became tight and that simple log cabin just was our real home for many years. I've always imagined the Log Cabin block to have sprung from the American Pioneer heritage. But this week I was excited to learn that the design was possibly first discovered by British Archeologists digging up animal mummies in Egypt! If I had stumbled upon these kitty cats below, I would have gone home and made quilts too! Early British quilts of this design were called 'Egyptian' or 'Mummy' quilts.


The design came to America in the 1860s, probably via British and Amish settlers, a decade of turmoil and war in US history. In 1865, when Abraham Lincoln was assassinated, Andrew Johnson came into office. Both men had been born in log cabins and this become a powerful symbol through the second half of the 1800s, used often to remind voters of their humble origins. They were 'men of the people'.

The log cabin symbol came to encompass American history, ideals, and identity. It was linked to a president that ended the civil war, it expressed trustworthiness and humility, and also that anyone, no matter their beginnings, can become anything they choose. If you want a quilt that represents the great American dream, this is your quilt.

The first time we see this quilt design named 'Log Cabin' is in 1869. By the 1870s, the design became so popular that it was often given its own category in country fairs. They were often made of wool blends, and then later from cotton and silk. Interestingly, they were almost always foundation pieced onto a square of muslin. They weren't often quilted, but tied in the centre squares.

I'm guessing the reason for this explosion of log cabin quilts was not only political or nostalgic, but also due to the seemingly endless variations in design that can be achieved through this simple block. Today I chose a variation called "White House Steps", a name a whole lot less humble than log cabin, but I think the symmetry will work well with the rest of my sampler quilt.


LOG CABIN 12" BLOCK TUTORIAL

You will need:

Red: Two 3.5" x 2" rectangles, two 6.5" x 2" rectangles, two 9.5" x 2" rectangles, two 12.5" x 2" rectangles.

White: One 3.5" square, two 6.5" x 2" rectangles, two 9.5" x 2" rectangles.


1. Sew the two red 3.5" strips to opposite sides of the white square. Press toward the red.

2. Sew the 6.5" strips to the other sides. Press.


3. Next, sew the 6.5" white strips to the sides which have the shorter 3.5" strips. Press. Sew the 9.5" strips to the other sides.


4. Finally, sew the 9.5" red strips to the sides where the 6.5" strips were sewn. Press and sew the remaining 12.5" strips to the last edges of the block. Press.


And done! 


With so much history and symbolism encompassed in one humble design, I can see why they became a category of quilts all on their own, can't you? I'm adding this to my 'want to make' list!

Saturday 27 June 2015

Mountain Campfire Quilt


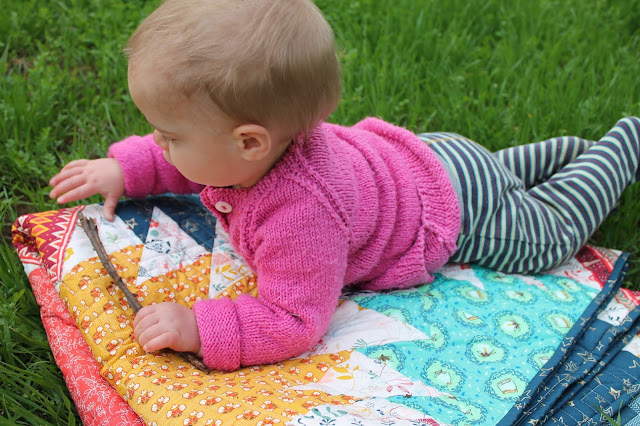
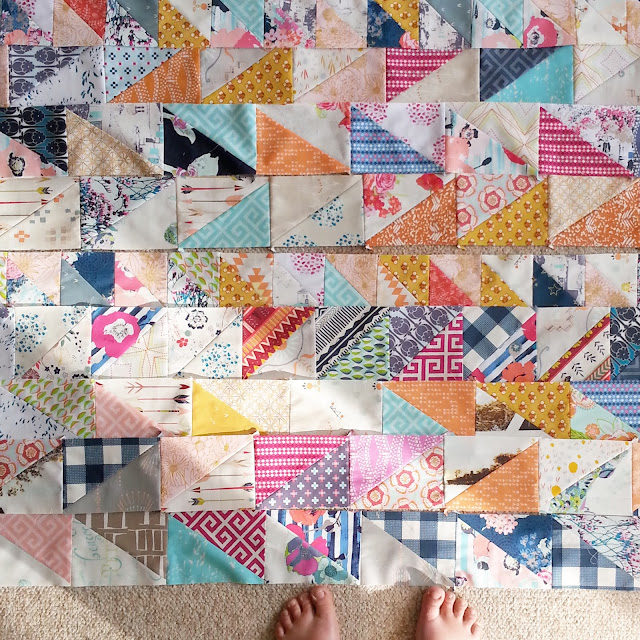
There is something so satisfying about finishing a quilt that's been a long time coming. Even more satisfying to snap and edit the photos, to stand back and admire your work, to see in the flesh, the realisation of the idea you had several months ago.


This is Mountain Campfire. Named because the prints, Wild and Free, designed by Maureen Cracknell, and the design remind me of first moving from the city to 100 acres off the Mid North Coast of NSW when I was 12. My parents bought a farm, complete with horses, caravans and an old beat up Land Drover that had been abandoned by a couple going through a divorce. They left everything. Old song sheets and guitars, garden sheds full of blankets and mattresses, tin cups and tinned food. There was no electricity or septic system. No running water. I thought my parents were the coolest people who ever lived. It was quite the adventure!


These beautiful, warm prints arrived just as I moved back to the country, albeit to a different part of Australia, and working with them has felt like home.
I cut most of the pieces using my Accuquilt cutter, and made the quilt queen size to get enough repeat of the design. And then, feeling terrified of quilting something so big and special to me, I sent it off to Jeannette Bruce of Gone Aussie Quilting who quilted the perfect, all-over, boxy design on it. I'm so glad I took this option! I'll definitely be using it again, especially for queen size quilts!


I intended from the beginning to take my time with this quilt. I wanted to enjoy it, and not feel pressure to get it done. And while I'm glad I took that route, I never expected it to take six months! When I thought of savouring this quilt, I thought of sewing it when I felt like it. But often it sat waiting patiently in it's box, while I got other quilts finished with more certain deadlines, even though I wanted to be working on it! It's made me realise it's not just enough to intend to be slow, but to clear out the space for it also.

Now, thankfully, the intended recipients of this quilt are travelling the world on their honeymoon. And I'm just a little glad it gets to stay in my home for a few extra months before I have to hand it over! In the end, it's probably the best way to enjoy my work!


Thursday 25 June 2015

WIP Box Overwhelm


One of my first blog posts for this year was The WIP Box Reflections. I shared how the challenge I set myself to empty my works-in-progress box taught me to use the box well, rather than feel guilty or overwhelmed that I needed one. I could freely put projects aside to wait for the next burst of inspiration. I could keep the lid on that box open and available for when I needed a gift or custom order, rather than hide it away to think about later. However, this year I've caught myself often feeling overwhelmed with the amount of quilts I have on the go. And it's made me wonder if my system needs tweaking?


I'm coming to realise that there are two kinds of WIPs: The ones that have been shelved because of lost love or motivation, and the ones that still inspire. The ones that have a clear deadline, and the ones that can be put off till the right time or mood strikes. Last year, my WIP box was full of projects for which I had lost motivation and had no clear deadline. The perfect projects from which to free myself of guilt and let them sit there waiting patiently. This year I seem to keep taking on quilts that I want to be finished NOW. I'm inspired by all seven of them! I want them completed by a blog hop date, or while the fabric line is still current to help inspire other makers or support the designer. When I have several of these quilts on the go, the pace seems frustratingly slow for all of them. They come off and back on my design wall regularly. And I use all my sewing time questioning whether I'm using my time well, and which quilt I feel like working on most, and whether that's even the best way to decide!


Part of my challenge is setting realistic goals. This involves thinking through the details. And I am not a details person. Sometimes, when the week goes well, the babies sleep, and I have an easy chain-piecing quilt to make, I can finish a quilt in a week. But as my designs have become more complex, as I play more with individual blocks and write tutorials, or hand stitch, I haven't readjusted my expectations for how long a quilt takes. Before I took on my Red Sky at Night project this year, I did not take a single second to think about how I was going to write 49 tutorials. That requires day-time sewing for good photos and research for history. At the moment, I'm spending a day a week on that quilt, and only just keeping ahead. Lesson learned!


I am very open to learning lessons. And because I don't always think through things first, mistakes and experience are my constant teachers. I'm learning to embrace that rather than tell myself, "I should have known!"
So last night I wrote out the quilts I was working on currently, and s-t-r-e-t-c-h-e-d out my plan till the end of the year. One quilt a month. And like every good addict should, I agreed with Tim to check with him before I take on another deadline quilt, for a blog hop or custom order. I find it tempting to just set a no-new-quilts rule. But a creative person still needs a little wiggle room right? A little space to follow whims or exciting opportunities. I'm just hoping the whim strikes in October, rather than next week!


If there's one thing I think I'd love, it's a week, or maybe even a month locked away in my sewing room, so I can dive in to all those projects floating around my head all at once. But assuming that won't be an option for another twenty years or so, I think I'm going to enjoy my sewing time, and my rest-of-life time with this new WIP box strategy. And maybe, maybe next year I'll become a bit more of a one-at-a-time kind of maker? I guess time will tell what this second half of the year teaches me.

And I'd love to hear, how do you combat project-overwhelm?


Linking up with WIP Wednesday

Monday 22 June 2015

Spanish Moss - Red Sky at Night Quilt


In our adventurous, pre-children years, Tim and I traveled to Europe to study in Russia, visit friends, and walk the Camino de Santiago, a 1000 year old Catholic pilgrimage through the north of Spain. We walked 25 kilometres a day (around 15 miles) for two weeks straight, a total of 300 kilometres. It was so challenging, but also the most rewarding and relaxing leg of our five month trip. Each day we woke up, bought a chocolate pastry and a coffee, and started walking. When we got tired, we stopped for a break, when old ladies stopped us on the side of the road to sell their homemade cheese, we bought it. It was a journey you could drive in an afternoon, but taking two weeks meant we ate afternoon tea overlooking purple hills of Spanish heather, we took in creeks and farms and German tourists. We watched bread bake in an old woodfire oven, and then ate it for lunch. It's amazing what you can see and taste and feel when you go slowly.

Last year I made a hexagon quilt while I waited for my baby girl to grow inside me. A friend once asked why I chose a pattern with such small pieces that had to be hand-stitched. Surely a blanket could be made in an afternoon? I can't remember my words exactly, but I remember a conversation following about taking our time. About making slowly being an important part of the experience. Choosing the little colours, basting them over the hexagon paper, stitching them together piece by piece. This was a quilt that would express part of who I am. It would be part of my memories of being pregnant, part of my hopes for this little girl, an expression of my love for her, that I would be willing to take my time.

When I found Spanish Moss in a random quilt book earlier this year, I immediately loved it. I can't find it anywhere in Barbara Brackman's Quilt Block Encyclopaedia in the nine-patch section, and when you google it, you get nothing. So if you know this block by another name, let us know!
For the star points I used the method where you lay the small square over the large one and sew diagonally across it, wasting a small triangle. I've always felt uncomfortable with this method for sewing triangles, prefering half square triangles. But we've sewn a lot of those this year, and I'm learning that they're not always the most efficient choice. All that cutting and pressing and trimming and sewing back together again. I'll be using this method more often, believe me! Even if just to shake things up a bit! ;)

SPANISH MOSS 12" BLOCK TUTORIAL.

You will need:

Red: Three 4.5" squares, eight 2.5" squares, two 3 3/8" squares.

White: Seven 4.5" squares, four 2.5" squares, one 3 3/8" squares.


1. Sew three of the 4.5" red squares to three of the white squares, around each side. These will be the half square triangles. Cut through the square diagonally, and then in half again. Press and trim to 2.5"


2. Cut the two red 3 3/8" squares in half diagonally. Sew the opposite sides on first, Press towards the red, and then sew the other corners.


3. For the star points, sit a red 2.5" square in the corner of a white 4.5" square. Sew through the red square diagonally across the corner. Trim the excess little triangle 1/4" from the seam and press toward the red.


4. Repeat on the next corner, then repeat on three other white 4.5" squares.

5. Arrange each of your 2.5" half square triangles around a 2.5" square as pictured below.


6. Sew together in pairs and press open. Sew those pairs together to make 4.5" squares.


7. Arrange your block as pictured with the little triangles pointing towards the star. Sew together in rows of three. Press.


8. Sew your rows together and voila! Another pretty star for your collection!


I had another friend, an artist, once say to me that she could never quilt, because she couldn't cope with losing all that fabric in the seams. What a waste! But quilting reminds me that life isn't just about conserving energy or time or the odd quarter inch of fabric. It's not about taking the fastest route or the easiest option. There is great value in stitches done by hand, in sewing red corners to a square to make a star, in cutting up beautiful prints and sewing them back together again. It's not waste. It's experience and beauty and effort and love. And these are worth far more than economy.

Monday 15 June 2015

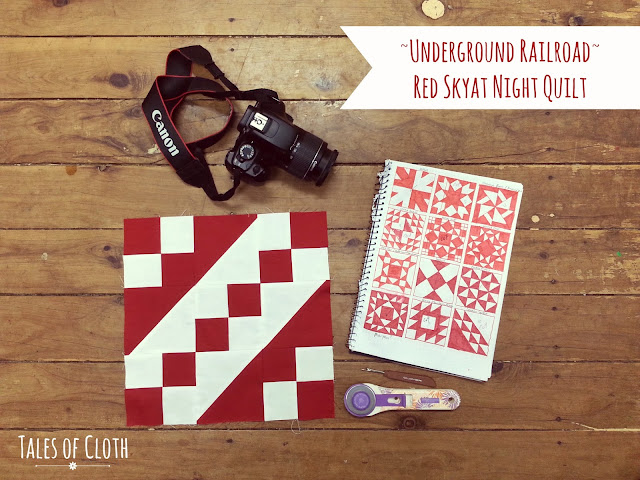
Underground Railroad - Red Sky at Night Quilt


When I first embarked on this year long quilt block history project, this is one of the blocks I especially had in mind. I'd heard stories over the years about quilts being used in the Underground Railroad to help free slaves. Incredible! Imagine if I could find similar kinds of stories about other traditional quilt blocks!
Those of you who have been following this quilt along know the road hasn't been so straight forward.  Many quilt blocks were made because they were pretty or interesting or inspired by nature or everyday household items or Bible stories. The interesting history has not come with the individual blocks, but with the way quilt patterns were shared, first published in farm journals, then later in books. Before the 1890s, women would know a collection of patterns that were handed down from their mothers or shared with neighbours. Newspapers brought about an explosion in quilting, quilt block design, and shared patterns, and quilt names. The names and symbols we know so well in traditional quilt blocks only became important with the advent of published journals. Even though quilt making has been common in America since the 1800s, I've been surprised to learn that much of quilt block history comes from the twentieth century, not the Civil War period, as I imagined.


Underground Railroad was published under the name Jacob's Ladder, in the first known quilt book Quilts: Their Story and How to Make Them, by Marie Webster in 1915. Ruth Finley, another quilt book author, named it the Underground Railroad in 1930, and claimed the block to be 'pre-revolutionary', though there is no evidence that the block was made at all before 1900. Other names include "Road to California", "Off to Chicago", and "Under the Covered Wagon".

In 1987, the first mention of a 'quilt code' appeared briefly in an unsubstantiated comment in a feminist film. It asserted that quilts were made specifically for the underground railroad which helped slaves escape north to freedom. Later, the story developed that ten different blocks, like the churn dash, and log cabin, held special meaning, communicating secretly to slaves the location of a safe house, or to 'carry tools,' 'prepare food,' or wait for a ride north. An explosion in slave quilt myths, tourism and business, and historical study followed. I even found educational literature for primary schools! It's a great story. But unfortunately, it has no historical basis. According to Betty Ross, over 300 first hand accounts of slave escapes along the Underground Railroad have been preserved, yet not one mention of quilts or quilt blocks! Sigh. I would have enjoyed telling my kids that one.

If you'd like to read more, check out The Underground Railroad Quilt Code by Betty Ross, or Facts and Fabrications by Barbara Brackman.

UNDERGROUND RAILROAD 12"BLOCK TUTORIAL

You will need:

Red: Two 5" squares cut in half diagonally, ten 2.5" squares.

White: Two 5" squares cut in half diagonally, ten 2.5" squares.


1. Sew all the red 2.5" squares to the white ones.


2. Sew the red triangles to the white triangles. Press seams open and trim to 4.5"


3. Lay out your block as pictured below. Interestingly, this block is exactly half white, half red. So you can flip the blocks to make it look 'red on white' rather than 'white on red.'


4. Sew the blocks together in rows, and then those rows together.


Our quilt blocks tell stories, but not in the way I expected. We like things to be old. I like to think of women stitching the same quilts as me on the Oregon Trail or the Underground Railroad. I like to read Laura Ingalls Wilder to the kids before bed and wonder which patterns they used. But most of these blocks don't come from these women telling their stories. They come from their daughters and granddaughters telling these stories. American quilt block history is not the story of pioneer women shaping a nation. It's the story of telling stories. They are about connecting across borders, making friends, sharing ideas, being inspired, and reminding themselves of who they are, what they believe, and where they come from, all in the context of the wars and depression of the early 1900s. It's a wonderful history. And I hope we don't feel it needs adding to.

Wednesday 10 June 2015

Quilts and Sunshine


It's incredible, don't you think, that when the sun shines on a barren field, and grey sky, it makes the most beautiful backdrop? In a way this quilt is like that, born out of the most tragic of circumstances, in the hope of shining some light on a grey day.

This is quilt #2 of the Flowers for Eleni. When I worked out that I would have too many for even a king size quilt and back, I made the decision to set a collection aside to make a single bed quilt. There was one particular flower stitched to a particularly pretty square that captured my imagination, and I built this little collection around the colours in that one block. I set one flower in the middle and started ring after ring of diamonds, at first in a rainbow, but I wasn't happy with how they all morphed into each other. I swapped the colours around to make them shine more.


For the back I used some leftover flowers, a print from the first quilt and some fun stripes I'd had in my stash for a while. I topped and tailed the flowers with some Kona (coral, maybe?) and it brought the whole thing together beautifully. I quilted it mostly in straight lines, with the occasional free motion line of flowers or loops or Eucalyptus Leaves (I had to include an Australian motif!) My favourite moment was laying Anna Maria Horner's Crescent Bloom in Fuchsia on the quilted layers, ready for binding, and have all those flowers sing out in agreement.


I have to thank my lovely friend Becky who travelled several hours with a nine month and a two year old to come and help me sew it all together. I'm also very thankful to Gina (@happygolizzy) from my do.Good Stitches bee who sewed around 50 flowers to squares for me and made my February blocks. This endeavour, as you know, became so, so much bigger than I ever anticipated. And I was completely blown away by all of you who generously offered help it all come together. It's been the most incredible experience, one that I still wish never had to happen. We quilters have this unique gift of making something that is at once an expression of beauty and hope, and also a practical, comforting hug. I've been especially glad for that. Add to that social media and a hashtag, and a huge collection of women stitching with prayers and tears... I hope it feels a lot like sunshine on the things that seem bleak, making them shine with warmth and beauty.

These flowers are now in their new home with the Hausers. Rachel wrote this beautiful, heartbreaking post after receiving them. And I have had this old human in my head ever since:

Oh, joy, that seekest me through the pain
I cannot close my heart to thee
I trace the rainbow through the rain
And feel the promise is not in vain
That morn shall tearless be.

Thank you, thank you dear friends for rallying with me to make these quilts. It's so much more than I could have done on my own.

Jodi. xx