Monday 30 March 2015

Red Sky at Night Quilt - Weathervane


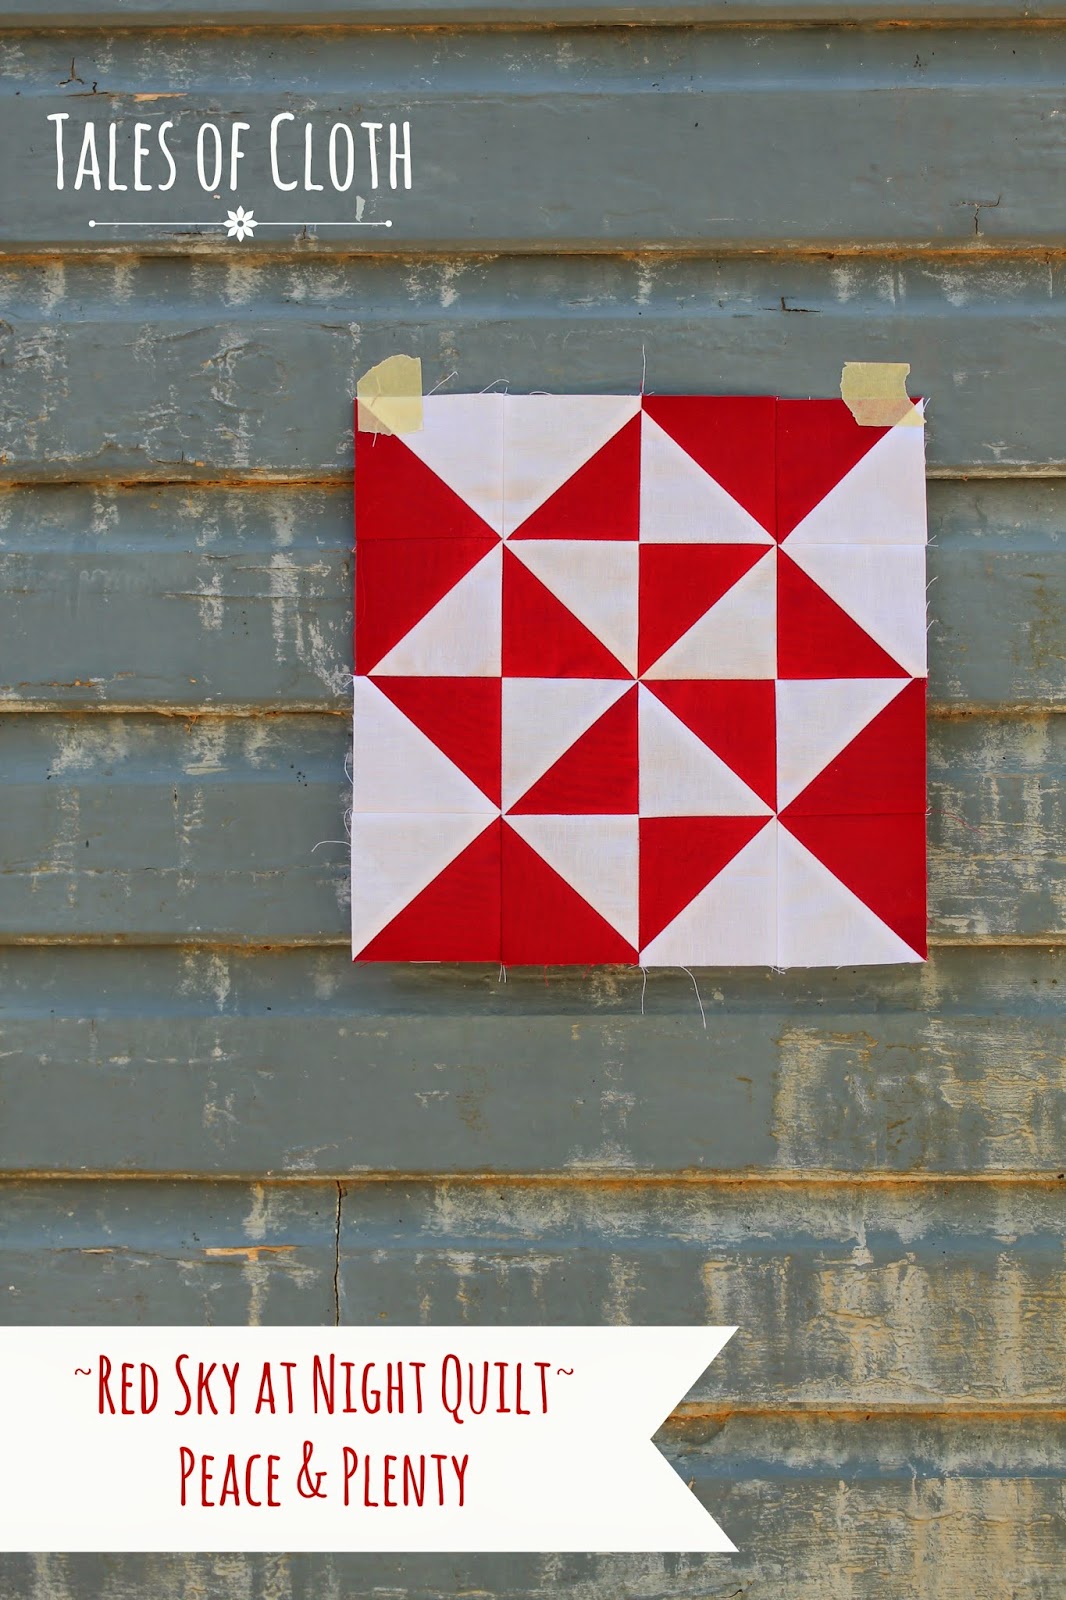
I just got home from a weekend in Melbourne with my brother. We were there for work, but in our spare time, we had a little stroll around the old city, where I made him take photos for this week's Red Sky at Night block. This is Weathervane. And it had nothing, really to do with urban living, but everything to do with one very industrious woman.


Last week I finally branched out and bought Barbara Brackman's Encyclopedia Of Pieced Quilt Patterns. I'd been trying to do a lot of my research online, like I used to for my History degree (though I could, back then, access the University Journal Database). I'm learning a lot about quilt historiography in this project. Quilt historians write books, quilt museums don't tell stories unless you take a tour, and a whole century's worth of a whole nation's newspapers and magazines and their quilt block patterns are sitting in libraries around the United States on Microfiche rather than on the internet. (why? WHY?) I'm starting to think a visit to America is in order. Can I stay at yours?

So this week, I bought a book. And I'm excited again. Because it helped me put some big puzzle pieces together. Brackman writes about her interest in collecting old patterns, which then turned into a career as a quilt historian. She talks about the history of published quilt block patterns in America. Newspapers and journals advertised patterns available by mail order. Pop a coin in an envelope and receive the templates! Even as I read that, I got that same buzzy feeling I get while waiting for a fabric order to arrive. I'm so glad for Paypal, but things haven't changed that much, really!


While blocks were mostly shared in periodicals, quilt block names changed by region, but then a few quilting legends started to publish books, and more and more names became canonised. Enter Ruby Short McKim, a creative and clever business woman with a supportive husband, who together, built a business around her artistic ability and needlework. She first started a quilting column in the Kansas City Star in 1916, and by 1931, she was so recognised and enjoyed that she published her first book, 101 Patchwork Patterns, which includes the first known pattern and mention of the Weathervane. It's available through the above link for free!  She writes, however, that the block, "dates back to the time when great-grandmother used that commodity to “calc’late a change,” instead of listening to a scientific forecast on the radio."
Did she just guess the block had been around forever? Or did she know of quilts made from her childhood? I think I need lunch with Barbara. 

WEATHERVANE TUTORIAL

You will need:

Red: One 4.5" sqaure, four 2.5" squares, eight 3" squares cut in half to make half square triangles.

White: Four 4.5" x 2.5" rectangles, four 2.5" squares, eight 3" squares cut in half to make half square triangles.


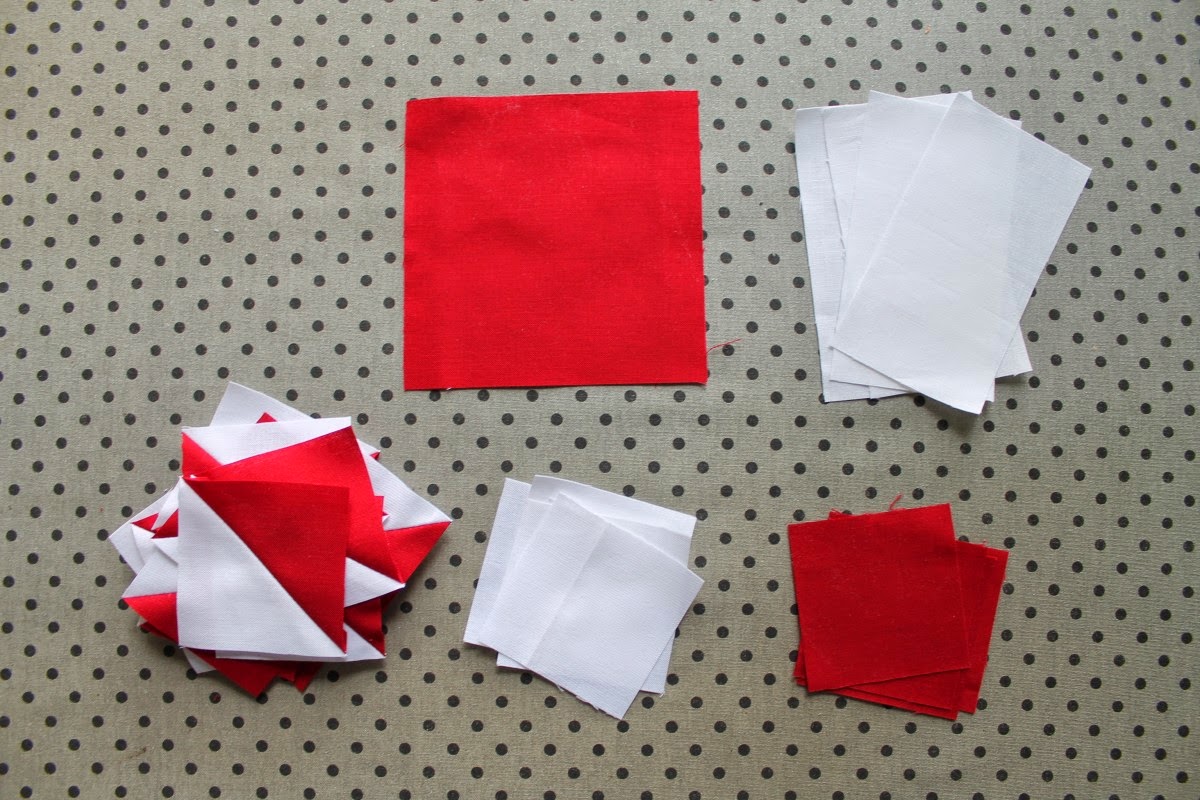
1. Start by sewing the red triangles to the white triangles, press and trim to 2.5"

2. Lay out as below.


3. Around the outside row, you'll find the red triangles facing each other. Sew these together first. Press.

4. Sew the white rectangles to the now bigger red triangles.


5. In the corners, take the half square triangle and sew it to the next-door square. The sew those two pieces together.


5. Now you have a Nine Patch! Sew the squares together in rows.


6. And sew the rows together.


I love old weathervanes (especially the ones with roosters!). And I love this block. But what I love most is how this block speaks of hard work, making opportunities, and family support. So maybe it was absolutely fitting to take photos of my block on a work trip in Melbourne while Tim stayed home with the kids!

Friday 27 March 2015

Quilts and other Colours.


Tonight we had a meal with friends over sunset. Tully asked if he could set up a picnic at our community barbeque area, and laid out all the quilts I would let him take outside. Then I, realising how cold it is now in the afternoons, dug out this winter coat that I'd made for Evie years ago and it fit Finlay perfectly. 


Our next door neighbours have new lambs, born to older mothers who can't keep up with twins, or younger sheep who abandon one of triplets. I feel a little sad for these new, happy things when we hear them cry out for food and company. But not too sad. Having a little farm twenty yards from my door, for which I'm not responsible, is pretty wonderful.


The sunsets here are quite beautiful, but what I love most are the reds and pinks that move across the hill outside my front door. Especially when children are willing to model recently finished quilts!


I was surprised when I finished this quilt a couple of weeks ago. Inspired by Rachel's Clambake Quilt-along, I followed her quilt-as-you-go tutorial. I decided on a single bed size because a customer had expressed an interest, and the first few lines of pressing and basting made me think I'd be here till September. But this quilt made the perfect project for movie nights on my own while Tim was away for his Masters, and to work away at quietly while my kids kept me company in my sewing room. I usually basted several lines at a time because I felt on a roll, and I'm not sure it helped me be neater or keep my lines straighter, but before I knew it, the quilt top was sewn, basted, quilted all in one go, and I was trimming the edges ready for binding! Just don't look too closely at those edges!
I used my free motion quilting foot which was messy and uneven, but more fun than wrangling my quilt around in curves. By the time I was done, I was so unsure of my work, but so besotted by the colours, that when I checked in with the customer and she regretfully turned down the offer, I was a little relieved! It's been on our spare bed ever since, and then tonight, because her quilt was damp from our picnic, Evie asked if she could have a turn. A single bed size is unusual for me, but it's oh, so useful! And I think I'm sold. I love having it in our home.


I asked some of our picnic guests if they could hold up the quilt for me, but the setting sun made it difficult to show off the exact tones of my clamshell quilt. But I'm sure you get the idea. The colours here are wonderful.

Tuesday 24 March 2015

Squash Blossom - Red Sky at Night Quilt


We had our homeschool registration last week. The NSW government requires that parents of homeschooled children prove in an annual or biannual inspection how we are fulfilling the state syllabus. That's all easy enough if you want to follow the state syllabus. But when you'd actually prefer to read Little House on the Prairie, take a gentle approach to reading and allow a lot more time for climbing trees and learning to sew, you've got to use your imagination. I spent hours writing about how our everyday life covered the early primary criteria, and then sat for an hour and a half with a very kind and gentle inspector, showing him the quilt Tully and I made together, and the books we've read, and the conversations they inspire. It was, in the end, very encouraging, to have all the things we do together in our day written down like that, affirming the job I'm doing, and that it's all very worthwhile. As a mum, it's so easy to experience the days sink through that hourglass, marked with tired kids and mess and a complete lack of inspiration for dinner. But at the end of our time together, the inspector told me I'd not only fulfilled the criteria for Kindergarten, but my plan covered years 1 and 2 also!


I think I've mentioned before that reading the Little House books fills me with nostalgic longing. I love their almost complete self sustainability, their joyful posture, their competence and simplicity. I love that Laura had a corn cob wrapped in a handkerchief before she was old enough to have a doll, I love that for Christmas one year, they were so excited and grateful to receive their own tin cups from Santa Claus. And I find great peace in the apparent lack of worry about how the girls will 'turn out'. They play together, make patchwork, do their chores, live miles from anyone, and there's never any mention about 'socialisation' or 'syllabus criteria'.

I didn't intend to get on my 'high horse' while writing about the Squash Blossom, but all in a whirl this week, I've had on my mind, our longing and freedom to live life a certain way, according to our values and personality. And then this wonderful block, which in some ways looks nothing like a squash blossom (just like a pumpkin flower) and in other ways you can see the inspiration or connection exactly. It's so beautiful and individual, far more abstract than many of the other nature blocks, and I think that's what I like most about it.


In The Farmer's Wife Quilt book, the squash blossom and the churn dash, two old blocks inspired by everyday domestic life in the country, happen to share a page. The letter published along side the blocks speaks of 'finding herself' in the country, of enjoying work on the farm because it felt necessary and appreciated, creative and skilled. And I think the blocks that come out of that era reflect that skill. I admire their design sense, their intelligence and adventurous spirit (especially Laura's mother!). And I've been buoyed this week with the reminder that even though I enjoy many modern conveniences and I would like to perform a serious cull on the amount of toys we own, I still share some of their skill for creative interpretation!

SQUASH BLOSSOM BLOCK TUTORIAL

What you'll need:

Red: Eight 3" squares cut in half to make half-square triangles, four 2.5" squares, two 4.5" x 2.5" rectangles.

White: Eight 3" squares cut in half to make half-square triangles, four 2.5" squares, four 4.5" x 2.5" rectangles.


1. Sew the red triangles to the white triangles. Press and trim to 2.5"


2. Lay out as above. Sew the pieces together in rows.


3. Sew the rows together in sets of two.


4. Sew the last three sets together and celebrate your skill and creativity!


Now, if I could just get that dirt to grow something...!

Friday 20 March 2015

Pray, Love, Remember.


Today was Finlay's birthday. And yesterday I finished my Gran's quilt. My Gran is 97. And my little girl is one.
It's hard to believe in this everyday life of rescuing glasses from coffee tables, and Finlay from the marble collection, of squashed banana underfoot and kissy smudges on windows, that a year ago I was holding a tiny bundle on my breast, trying not to fall asleep from the morphene, glad she was finally here. Two years ago we were grieving the loss of the little unexpected one we never met. Three years ago, I was done. Two toddlers felt like twenty. I'll have my body back now thank you.
And time rolls ever forward, bringing surprises and change and grief and joy. In the end, we decided on this one more, and I felt both peaceful and terrified. Would she be the one to break me? Would there be any me left?


About 70 years ago today, my gran had a little girl. Her name was Rosemary. She was Gran's first child, and at the age of six, she died of cancer. Her second child was 'born asleep' in the days when still born babies were whisked away and mothers told to move on without a moment to stop and grieve and feel. These babies did break her. And in many ways she never recovered.
In Hamlet, Ophelia says, "There's rosemary, that's for remembrance. Pray, love, remember."
I've been thinking about that today. Not that I wanted the day to be sombre, but I did want to mark the occasion, to recognise the fragility of life, the fragility of our own goals and plans, to be right here, to hold her when she let me, look her in the eye, blow raspberries, splash the bath water, eat cake, laugh. It is my way of saying, "I don't know what life will bring, but right now, you bring me joy," and also, "Even in all your mess and noise and complete lack of routine, you bring me joy."


This little girl has been our delight this year. It hasn't been the long slog my other babies were. Partly that's because she is actually incredibly easy, but it's also because in a way that has been surpising and wonderful, she has broken me. Broken my old expectations and rules, broken some of my impatience when I don't get my own way. She has chipped away at my need for control, for unbroken sleep, for doing things as planned, to have it all figured out before jumping in. She has brought out something in me I was afraid never existed.


I made this quilt for my Gran, because I have felt for some time, that even though I don't really know her old broken mind anymore, even though she lives in care, and can hardly see, I wanted to acknowledge that she is still here, still precious, still loved. I chose these 1930s reproduction prints in the hope that they would feel familiar to her, and this Ohio Star design because I love traditional, repetitive quilts which remind me of lovely old ladies and cosy homes. I used stippling for the quilting for the first time because quilts for grans are the best kind of quilts to practice new quilting techniques!
I showed the beginning of this quilt at the last Sew the Library link up, and finished it just in time for the link up today, hosted right here! I was inspired by the beautiful Ohio Stars in my favourite quilt book, Country Quilts.


So today our family and friends celebrated this little light. We watched her face as she tried her cake, and as she searched the house for the big kids and squealed when she found them, and as she wondered what on earth was that thing Grandma tied to her head.
And I thought of my lovely gran, and I felt glad for quilts and birthday cake, for moments of extravagance and beauty and fun even though they won't always be remembered. It made me feel that life really is very precious.


Monday 16 March 2015

Red Sky at Night - Broken Dishes and Whirlpool


I had the special treat this week of borrowing the wonderful Quilt History book, "The Fabric of Society" by Annette Gero, which focuses on Australian Quilt history. I was surprised to discover that there were almost no 'block' quilts in the book. Australian quilts in the 19th century, followed British fashions at the time, which were mostly medallion quilts, hexagon quilts, or applique. I thought this series would take us around the world, but interestingly, it appears these creative, beautiful blocks are unique to America's history. The book is full of interesting stories, though, and if you can find it in your library, I recommend it.


Today's blocks are older even than Colonial Australia and are made from half-square triangles, the quilt block staple. I've put these ones together, partly so we can condense our Quilt-Along to fit within the year, and partly as a follow-on from last week's Peace and Plenty. It fascinates me the wealth of designs derived from the humble triangle and how different a feel each of these blocks evoke.

The Broken Dishes block is one of the oldest known traditional quilt blocks. I've always wondered at this name, assuming it must have come the regular everyday stuff of pioneer life, though I thought this an unusual choice for a name, and couldn't quite make the connection with the inspiration. But on further research, I discovered that broken dishes were a traditional grave site decoration used by African American slaves. When I think of broken dishes in terms of mosaics and art, I can see the connection, can't you?

From the book 101 Patchwork Patterns by Ruby McKim, 1931
I love the star that comes through in this block when it stands alone (rather than repeated), depending on how your eye focuses on the lines. But I do find it boxy and jarring, compared to the flowing shapes of the Whirlpool block, which is almost identical to Peace and Plenty, except for the white diamond in the centre instead of the pinwheel, yet it still looks unique.

TRIANGLE BLOCKS TUTORIAL

You will need:

Red: Eight 4" squares for each block, cut in half into triangles

White: Eight 4" squares for each block, cut in half into triangles

1. Sew the red triangles to the white triangles, press seams open or towards the red, and trim to 3.5"


2. Arrange your quilt blocks as shown below.
Both blocks are a 'Four Patch' of a 'Four Patch'. If you look in the bottom right quarter of the Whirlpool block, you'll see a larger red triangle under a parallelogram. That part of the block is repeated, but turned once around the quilt block.


The Broken Dishes block is arranged in 4 diamonds, with alternate colours facing inward. 


3. For each block, sew squares together in pairs, press and sew those pairs together into squares. Press and sew the larger squares together, and then then the final two pieces together.


Today's tutorial was basic, due to an onslaught of children arriving at my house today while I was making, delightfully leading to an abundance of questions about sewing and quilts and a beautiful fascination with these lines and shapes. So I had far less photos that I remember taking, but still a feeling of deep satisfaction that I'm passing on the quilting bug! I wonder why these blocks and others didn't make it into many Australian and British quilts? I think they are so simple and clever and beautiful. Maybe I'll learn more along the way. Meanwhile, if you need to go back to the Peace and Plenty Tutorial, it has more detail about how I prepare the blocks for sewing together.


Monday 9 March 2015

Red Sky at Night - Peace and Plenty


This week my car broke down. And my washing machine died. If you're a mum, you'll understand which is more devastating. Last weekend, I sat and sewed with a friend whose life hasn't taken the normal path of marriage and a family. I had coffee with a mother of three children in wheelchairs, talking about her longing for a custom built house. And this week I've written probably 200 emails to people who have asked for my address so they can send a flower to Rachel and her family. I've wondered many, many times, what I can say about the block "Peace and Plenty"?

The other night I had a dream that I put my kids in school. I homeschool my 6 year old, and my four year old will be school aged next year. In my dream, I breathed this great sigh of relief and sewed and sewed and sewed. (The baby must have been asleep or something!) I often think, if I could have a whole day to sew, I would catch up on this crazy list, and have a clean slate. I'd be at peace. And then I get a whole day, and I think, "If I could just have a weekend..." But I've had those before too. I've had three days a week in a shop in town before...

The phrase "Peace and Plenty", as far as I can gather, was first used by the Scottish Clan of Cavanaugh in the 12th century as their motto. It's been used since to name artworks, plays, pubs, and books about financial success in middle age.

The phrase, long used as a kind of ideal or blessing, was first given as the name for this block by designers at Farm Journal, the predecessor for The Farmers Wife publication in the early 1900s. And I especially love this block made into a whole quilt. The way the large and small triangles play with each other is much more interesting, a bit more messy, that an ordinary half-square-triangle, or pinwheel quilt. 

The little bit of trivia that has stuck with me this week about the term "Peace and Plenty" is a quote from Shakespeare's play Cymbeline, and this week especially, it seems to fit more with my experience of life. 


Trust Shakespeare to play with the words, to twist it. But I still like it, don't you? I have such a strong idea of what Peace and Plenty would look like in my life. But even when I get it, it doesn't evoke gratitude or courage. It's challenged me this week to keep saying the phrase, "Right now..." 
"Right now, I get to sew. Right now, my children are happy. Right now, 200 women around the world are stitching flowers for a grieving, desperately hoping mother." 
There's a big part of me that still wishes I could step into an alternate universe where machine's don't break and children aren't born with disabilities. But wiling away my time daydreaming about that seems cowardly compared to facing up to this universe with hope in the moment.


PEACE AND PLENTY BLOCK TUTORIAL

For the next two weeks, we're going to sew three blocks, made completely of 3.5" half square triangles. It gives us a chance to get ahead a little, so we can complete the blocks by the end of the year. I also think it's fun seeing the myriad of ways triangles can create different designs. So start cutting/pressing/trimming those triangles! If you want, you can triple this week's cutting instructions and use the leftovers for next week.

You will need:

Red: Eight 4" squares cut in half to make triangles.

White: Eight 4"  squares cut in half to make triangles.

1. Sew all your red triangles to your white triangles and trim to 3.5"
 

2. I'll show you the layout in steps through pictures. First the border:


 3. Then lay out a pinwheel in the middle.


4. Next, we're going to chain piece. (sew all the squares together in one sitting.) If that worries you, feel free to sew pair by pair, or rows at a time.
Lay your first square from your second column over your first square. Work like this down the two rows.


5. Now, keeping note of white side your seams are on (the right hand side - I always do this bit with my left hand so that the seam is facing out), put your first pile on the one below, all the way down, and then on top of the next row of squares.


 6. Place the pile next to you at the machine and sew them together, on pair after the other.


7. Snip the blocks apart, press the seams open and lay out again.


7. Sew together in squares, press and sew those squares together. Press and sew the final seam.


I don't own my own home, have superanuation, or even a quiet three hours to write this blog post. (Finlay's pulled herself up to my chair and is screeching at me as I write.) But I'm learning that Peace and Plenty come with gratitude, not the other way around. 

Jodi. xx