

A few months ago, I embarked on a Cathedral windows quilt, and then quickly 'came to my senses' and popped it in the WIP box. Why on earth does someone make a Cathedral windows quilt? It's not like your usual sandwhich of top-wadding-backing. My 'learning as I go' sewing was pretty rough and tumble. And I didn't know if I wanted to go so far as to make a quilt for a bed, but I didn't really want a wall hanging, and we don't really need another lap quilt in the house. I never realised the need to sew with a clear end in mind was so strong in me!
Then earlier this month, I made the decision to dedicate October (#WIPtober on Instagram) to my WIP box. It was full to overflowing with abandoned projects that had been set aside for clearer goals and quilts with deadlines. But for October, I would try to set aside that need for a purpose, and sew just because. I would withhold from starting new quilts, and I would find ways to be re-inspired by the old ones.
So even though it goes completely against the grain, and I feel like I've launched off the runway with nothing in mind except to enjoy the view, I brought out this sweet little project and started to sew. And you what? When I'm really good at beating back that 'Why are we doing this?' voice, I really enjoy fabric origami! These come together in a way so that with each new row added, you have a complete 'quilt'. A change in the process is as good as a holiday, and there's something a little exciting about knowing that when I've had enough of sewing together folded squares of fabric, I'll be done!
There are quite a few Cathedral Windows tutorials in the ether, but I thought I'd add mine to the crowd, because I tried a few different methods and have settled on a mix of them. I'll share my reasons as I go.

Most tutorials start off with a large square, and I cut mine 11". It's too late for me now, but can I recommend 10.5"? That way you can cut off a strip from your yardage or fat quarter, and fit four or two neatly cut from the strip. I've got scraps enough for another quilt!
Most tutorials also ask you to cut a slightly smaller template from cardboard to iron the edge over, but I just knew if I had to stand at my iron working with a template, that this project wouldn't last long. After lots of scouring, I found a tutorial that folded the square like I do below. It uses more fabric (which I why I went 'scrappy' rather than use one print) but I like that this adds weight to the quilt. This can be a great way to use up those hard-to-use, big-print fabrics.
- First fold your square in half and sew along the shorter edges.


- Pull down the top edge and pin the two seams together.

- Sew along this new join, leaving a hole at the end for turning it inside out.


- Use a pin to pull out the corners and press flat with a steamy iron. The little hole can be left as is.

- Now fold the corners into the centre and press.


- Hand stitch the points down. I just nicked the lower layer of fabric with my needle, rather than go all the way through.
NOTE: If you want different prints in the 'petals', they need to be added in under these folds, before you stitch the corners down. (measure yours first, but 5" fit in mine) I tried it, but abandoned it. It's really hard to cover over the raw corner edge, and it stressed me out.
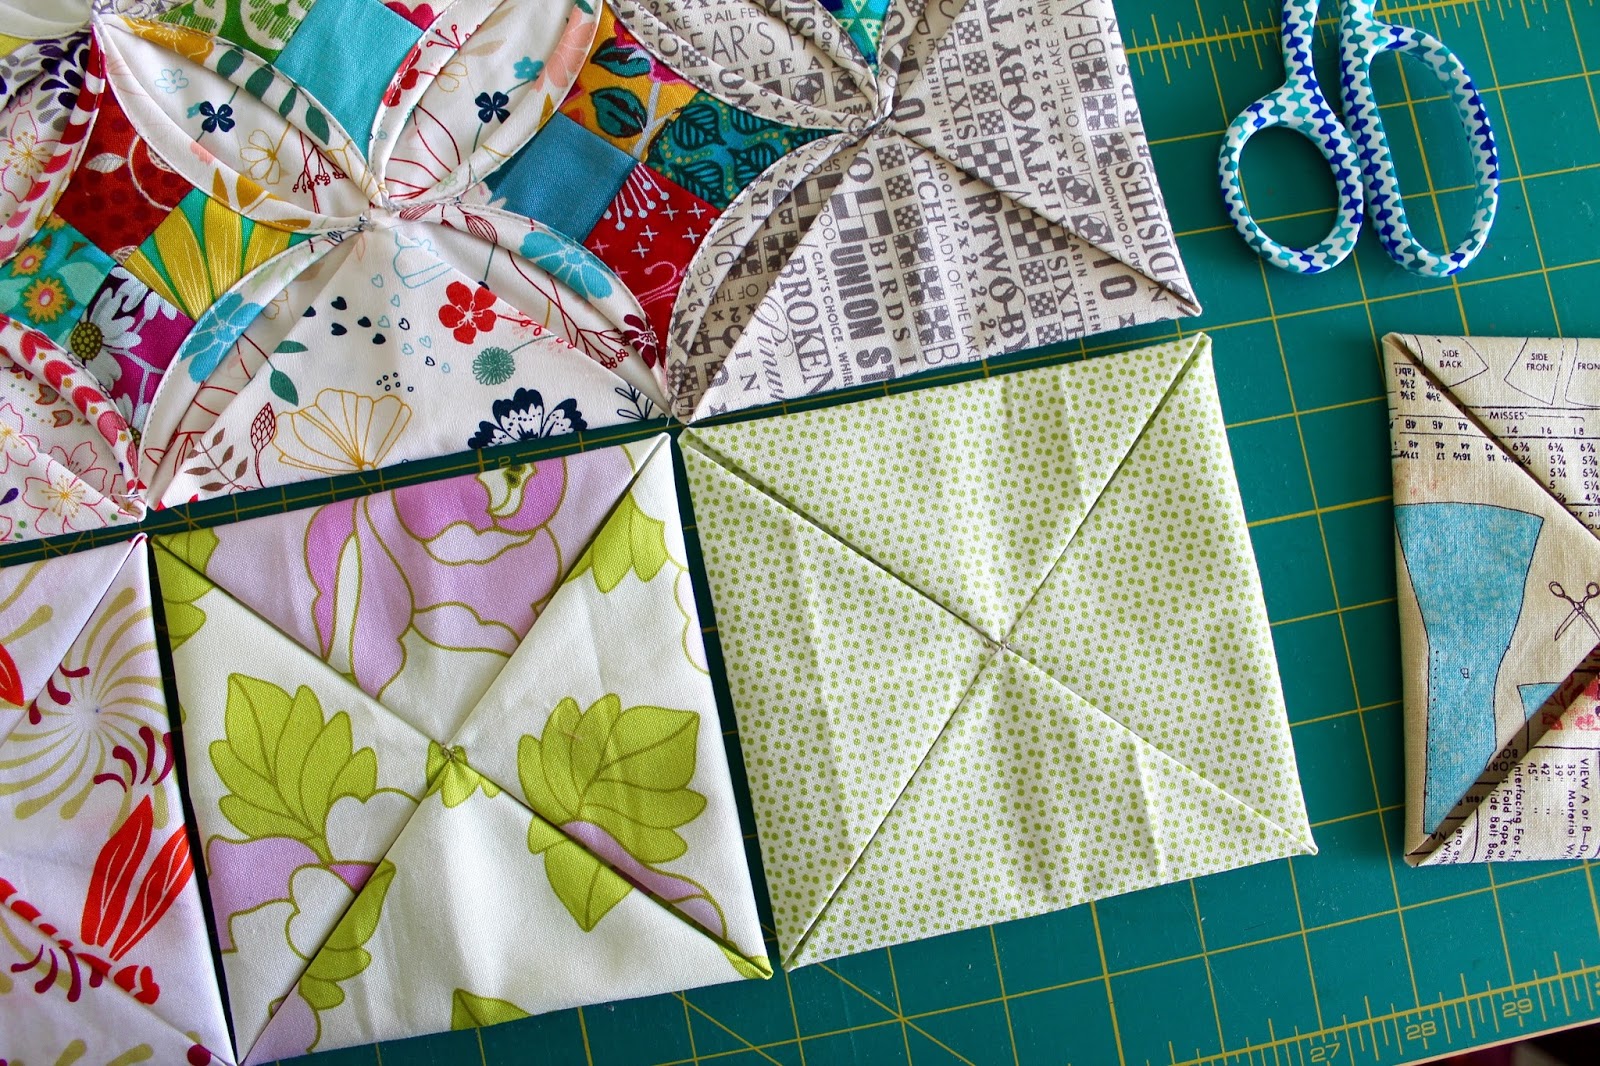
- Set your machine to Zigzag, around 5mm (1/4") wide and 1.5mm long. Sitting two folded squares up next to each other, zigzag down the middle to hold them together.

I'd already made a batch of nine at this point, so I stitched together another row of three and then added those to the large block with the same zigzag method.


Next, I grabbed the long-held scraps of another project I finished over a year ago. Oh, I love combining old WIPs, don't you? I cut up these squares made of rectangles, sewed them back together and trimmed them to 3".

- Sit your square over the seam between two folded fabric squares. Grab a fold along the side of the 3" square and fold it over the edge. It should curve naturally.

- Top stitch around that curve. This worked best for me with my walking foot.

- Stop at the next corner with your needle down, turn your work around, fold the next edge over, and sew again. Sew all around the 'window.'


- When you get around to where you began, if you can easily move to another square, keep the needle down, and grab your next piece. You'll have less threads, and a tidier back, if you can stitch these down in runs of four.

I'm always impressed by how much I learn, how much I'm forced to rethink things, to engage my creativity, when I give myself time for my old, abandoned projects. Maybe I should make #WIPtober an annual discipline?
Lovely! I love your tutorials thanks for sharing
ReplyDeleteGreat tutorial. I love these and have wanted to make one but most tutorials have left me scratching my head a bit. I might have to give it a go - but not before I finish some projects off!
ReplyDeleteSo pretty! I have always wondered how this was done so thank you so much for the tutorial. You made it look easy.
ReplyDeleteBeautiful! This is something I have wanted to try...one day! Great tutorial, one I really want to try!
ReplyDeleteThanks for the tutorial Jodi - you make it look so easy! I have been making some origami type coasters today and loving it, so I will definitely give this a go too!
ReplyDeleteLove this tutorial. The bright colors look beautiful. Adding this to the project list for sure. Thanks!
ReplyDeleteGreat tutorial!! Seems less daunting to me...so I really might give it a whirl!
ReplyDeleteReally lovely!!!
ReplyDeletethis is lovely -- it makes me want to add a cathedral window back to my quilting list.
ReplyDeleteThanks a lot for this tutorial, your quilt is already very beautiful. One day I need to try this, but I think I would not be able to pull through with making a whole quilt - might try making a cathedral window pillowcase :)
ReplyDeleteThis is a great tutorial, thank you. Love how this is looking. Do you have any idea how big you will make it?
ReplyDeleteClear and concise - great tutorial and I might have to give this a try as I tend to stop and start things depending on my mood:))
ReplyDeleteNicely written tutorial. I love your four-patch centers and the idea of scrappy background neutrals. I also started a Cathedral Window quilt and nearly gave up. I was glad to have tried it, but I could tell that making a whole quilt just wasn't going to happen. It became a set of four placemats which I love and use often.
ReplyDeleteI haven't done Cathedral Windows in ages. I remember thinking that whoever came up with this idea was crazy! I love the way you used so many scraps in the windows with the low volume background. It really works. Beautiful!
ReplyDeleteLovely tutorial, well done. 😀 xx
ReplyDeleteLovely tutorial, well done. 😀 xx
ReplyDeleteYour use of prints for the base part (?) is wonderful!! I was on a bit of a CW kick not too long ago and found the template method far too fussy as well! I just love everything you are doing with yours!
ReplyDeleteOh! And the zig zag join is brilliant! May have to revisit CW again!
DeleteAll of the tutorials I've seen before hand stitch the windows open, I've never seen it done by machine before, this is great!
ReplyDeleteI'm just in the middle of a cathedral windows cushion. The method I adopted is a little different from yours, but I like yours a lot. Interesting to have different backgrounds. That adds a lot of interest and movement. What a beautiful quilt you've made. Thanks for sharing!
ReplyDeleteCW has been on my bucket list for so long, I hated the idea that it used so much fabric that I couldn't bear to use any of my solids. But seeing yours? I absolutely love love love the idea of using prints and I am racking my brains for not thinking of that. I guess I have been too ingrained that "we have to use muslin". I am so delighted and thrilled that you "broke" the rule and made it MODERN! Truly! Woot!
ReplyDeleteThanks a million for this well explained and accessible way to make Cathedral Windows. Been meaning to try this for ages!
ReplyDelete