Tuesday, 4 June 2013

Super Simple 15 minute Cushion Cover


So my day started with a knock at the door. It was my lovely new neighbour, whose own day had started by finding one of my new chickens being eaten by her dog. :(
She felt so terrible, and I felt so terrible for her. Pet clashes can be such a terrible thing for neighbours. But I knew her dog couldn't get out but my chickens could, so I assured her that she must have flown over the fence and there was nothing else she needed to do. I went out the back and saw with relief that it wasn't one of my favourites (isn't that awful!). And she went to work and I went to play group. 
Then when I got home, I thought of her again. What an awful way to start the day! And I just felt compelled to give her something to maybe make it nicer and help her feel ok about it.
But what does one give to a new neighbour? I decided on a simple cushion cover.


When I lay the cushion on the fabric, I suddenly thought of a super simple way to throw together a cover. So I thought I'd share it with you here.
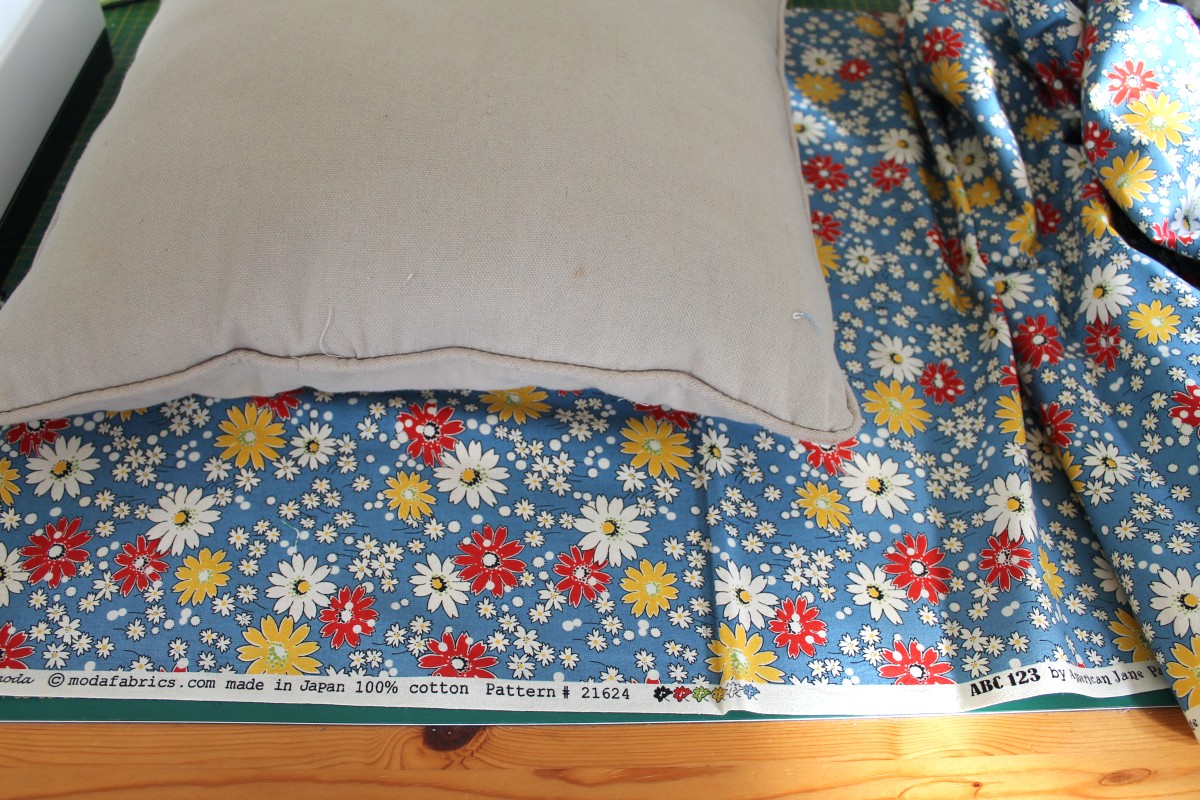

I cut along the width of the fabric, next to the edge of the cushion.


Then I folded the selvedges over at each end and sewed them. If you had pretty selvedge, you could leave this bit!


Then I wrapped the fabric around the cushion, right sides facing in and pinned the overlapping edges together.


Pull the cushion out, lay the folded square out flat. I shifted mine a little so the envelope opening would be more centred.


Pin along both sides.


Then I set my machine to an overlocking stitch and sewed up each raw edge.


Turn inside out and viola! A super quick and easy gift in nearly no time!


 I added my little dino boy because I like him. Then I wrote a card saying

"I'm sorry your day started with a dead chicken. I hope it got better from there. :)" 

and left it on her front porch, which neighbours my sunroom, before I had time to talk myself out of it.
Now to clip my chicken's wings! Poor little thing. 


Sunday, 2 June 2013

The Great Lego Debate

Follow my blog with Bloglovin


This morning, Tully and I started the day with The Great Lego Debate. Do you empty the entire bucket onto the floor (Tully's preference) or do you fish around in the bucket for the piece you're after? (my preference)
It wasn't a very nice way to start the day. The kind of start where I end up saying he can't leave his room till it's all tidy and go drink my coffee on the back verandah, while he wails in his bedroom that he can't do it on his own.
While overlooking my garden, I started to wonder if this was just going to end up one of those horrible days where I have to follow through with what I've said, even though I didn't put that much thought into it, and he spends the whole day trying to get out of it. It made me wonder what I actually wanted him to learn, and us to achieve together.


The last two weeks I've been doing Rachel from Stitched in Color's Homeschool Handmade course. We plan to start homeschooling 'officially' in the new year. Aside from clarifying what style of homeschool I wanted to create (a decision that has overwhelmed me for sometime), I've found it so helpful to think through my goals for our home. Can I share them with you?

Order: Not in the strict boarding school sense, but in the peaceful rhythm sense. I want to make some (flexible) decisions now about our weekly rhythms so I'm not making little decisions all day, every day.

Shared Family Responsibilities: I've mostly tried to include my kids in the running of our home, but now I want them to know we all contribute to keeping it going. Tully is now Vacuum Boy, a super hero who wears a Buzz Lightyear costume and vacuums the lounge room floor each morning. A finished activity gets tidied up before the next one begins, except for special projects that are going over a period of time.

Free time: I've often felt a quiet, nagging sense of guilt about how much time I spend intentionally with my kids. It's not that I spend no time. It's just that I hadn't defined or examined my expectations, so I always suspected I was failing. A couple of days ago when the kids snuck away from the dining room table to eat their lunch together on the trampoline, I realised (again) what a treasure it is that they get on so well together and play so independently. I wondered if it was actually my job to let them create these special moments, rather than always feeling like I should set it up for them. It confirmed for me that I don't want to take Tully away from this 30 hours a week, and that I didn't want our days packed out with activity.

Holistic learning: It's important to me that my kids learn skills, and not just information. I want us to be learning together how to approach tasks we don't really want to do, how to take responsibility for our actions, how to treat each other, and ourselves, with respect and kindness. And I want to make time for creativity and things we love.


So with this in mind, I went back into Tully's room and pulled him up on my lap. We talked about how I didn't want him to empty the lego everywhere anymore. We talked about how he might find it easier to create on a tidy floor than one covered mess. Then I told him I still wanted him to tidy up the lego, that our days are full of things we don't really want to do, but we can find ways to motivate ourselves to do them. I asked him what would make him feel more like tiding up. He suggested listening to Brooke Fraser (one of our favourite 'tidy up' albums) might help. I suggested thinking up something he wanted to do after that would help him get excited about finishing. We talked about breaking up the mess into sections and doing one at a time. And then he decided to race against the music, trying to have it all tidy before the second song finished.
An hour and a half of fuss and turmoil, was all cleared up by a breather, a 10 minute conversation and 5 minutes of happy tidying.

I am so thankful for this journey we're on. One where I know I'm just learning too, where we can learn and grow together, where we can bear patiently with each other in our different stages.

Rachel's Homeschool.handmade is still available as a private blog till the end of June. If you're considering homeschooling, and want to think through your family's goals, personalities and needs, and read others' reflections too, I really recommend it.


Friday, 31 May 2013

Apple Leaf Block {a template and tutorial}


In our new spare room/office (a result of our latest re-arrange), there hangs a couple of oversized 'baffles'. They're sound-deadening thingamies that Tim uses when he's recording music, that we've decorated so they don't look so out of place. We stapled some Ikea fabric to one and I pinned these beautiful apples, a mixed-media artwork by my very talented friend, to the other. 
Below the baffles lies the very bed I slept in when I was Tully's age. And on the bed lies a simple wool blanket.


June is my month for the Scrappy? Sew Bee it! virtual quilting bee and I'm asking my bee buddies to make me a quilt inspired by these apples to go on this bed. Thank you!
I asked Tim, who is as technical and design savvy as he is musical, (a great catch, really), to do up this Apple Leaf Block template as a PDF for you so you can make up this block for me (if you're in my bee) or for yourself (if you're not!). You can access the PDF file here.


Print the file, making sure your printer is set to no Auto rotate and centre, or scaling, or any other such thing. I've included a 1" square for checking it's to scale. You'll only need to cut out the leaf. The surrounding 6.5" square is just to show you how it eventually sits in the block, but you can use it as a template too, if you don't have a rotary cutter and mat.


So really what I've made here is an Orange Peel or Cathedral block. But though I searched, I couldn't find one where the leaves were appliqued onto little squares, and then they were sewn together. Instead, they were appliqued to the whole cloth, or 12.5" blocks, or pieced. And because my Bee just uses scraps, I thought a mix of neutrals on this scale would look much nicer. 


Cut around your leaf and affix it to your 6.5" block diagonally accross it, using your favourite adhesive method.
 *confession! While taking advantage of my sleeping toddler to get these blocks done in daylight, I realised I had run out transfer paper! So today, my favourite method was spraying 505 through my fly screen...


If you're in my Bee, I'm not fussy about your applique method. If it helps, I only ever use white thread, and my zig zag for these leaves was stitch width:2, length: 1.

Zig zag around your leaf.


For this quilt, I'd love a mix of neutrals, solids and prints, for the background, and colours from the above Apples art (Teal, green, aqua, red, ochre, and a little orange, yellow and pink)
Once you've made your applique leaf squares, there's several ways you can put them together.


You can make circles or flowers (and you can see above this is essentially the same pattern) or you can do a X and O variation.
For my quilt, I'd like them like this:


Sew your squares together (hopefully your corners match better than mine! I was racing the pre-school bell!) to make 12.5" blocks. (For my bee, you only need to make one.)

These came together SO quickly! And are such a satisfying way of eating into those scrap buckets. I can see myself making many more of these.

Enjoy! xx


Tuesday, 28 May 2013

A quilt for moving on.


It was in the aftermath of all the change and grief earlier this year, that this quilt was born. In the small, silent privacy of my new sunroom studio. When the repetition and attention and clear, quiet whites and greys, and just a touch of blue were having a tangible effect on my soul.


I had brought out my neutral bucket of scraps, (I couldn't imagine working with colour), fished around for the strips, then grabbed the leftovers from my Children at Play pinnies, and the linen ones, and the 'white on white' prints that I had used for a custom order quilt last year and never looked at again. I think it was the memory of that quilt, warm, calm, traditional, that made me feel grounded. And I wanted to create something like it again.


My first log cabins were very intentional. Each piece sewn and ironed and trimmed with care and design. And then (as I wrote here), as that lost its therapy, I started to chain piece. Then, more recently, as I started to feel more myself, I began introducing more pops of colour. More flat solids and less tone on tone. More modern prints and less care whether it matched.


I finished up all the 8" blocks and laid them out on the floor of my friends' house to ask what she thought. I had planned to make different sized blocks and have them scattered throughout. But the regularity of the squares made such a simple, pretty baby quilt.
Cath said to me, "That's pretty, but the other one you have in mind will be wonderful."
I'm so thankful now for that encouragement. It gave me the extra little push I needed to keep going when I felt like finishing up there. I felt the shift from this being all about safety (which was just right in the beginning) to realising I was in a place again where I could go beyond my natural attention span, or motivation, to create something I really wanted. And it feels good to be here again!


I'm joining in 'Festival of Strings'!

Scrap Attack {String Fever}

Monday, 27 May 2013

Stained Glass Little Folks.


So we live in a tiny 1940s workers cottage in an old coal port city. (The city is old - by Australian, not world, standards, the coal port is still active). And our house is a collection of small, enclosed boxes. Two bedrooms, a lounge room, dining room, all around 4x4 metres (yds) and a tiny sunroom, about 1.5 x 2.5m.

Our bedroom was the smallest in the house, in the darkest corner, right next to our neighbour's backyard, and their interesting choice of cigarettes. ;) And in the drama of the first few months of this year, and a moment of inspiration, I decided I wanted this season to be marked by rest, light and colour (and fresh air). And I couldn't get that in my old bedroom.

So we embarked on a (yet another, because a collection of boxes allows for change when the feeling hits) big rearrange. And we moved our bedroom into the light-filled loungeroom, our lounge into the old dining room and our dining room onto the back deck. My new sewing room now comes off our bedroom, and we put Tim's office and a guest bed in our old bedroom.


So that's our new lounge, or family, room through the glass doors from our bedroom. After wondering for a month or so, whether to make curtains or not, Tim and I had a flash of inspiration. Voile is practically 'two-sided', and glueing the fabric on would be a flat (space-saving), easy, removable solution to create privacy for our new room! So I measured the glass panels, cut this Little Folks Voile, by Anna Maria Horner, to size and started painting the windows with glue and fabric.


I chose only a few prints, in a limited colour palette, built mostly around the Diamond Mine prints. You can see the glass doors not only limited privacy, but made both rooms feel busier. The view through the doors was reflective and muddy. And if there was mess in the other room (which is often in our house!) it made both spaces feel untidy.


I used PVA (craft) glue and just lightly patted the voile over the glass. If I pushed too much, it would bunch, and was hard to rescue. The finished result has made both rooms feel smaller, yet brighter and calmer. I think I just sat and admired it for about three days!


On the other side, the kids have their little table, where they eat meals or do craft if it's too cold outside. I love that the 'back' of the fabric is still so clear, and the glass protects it from hands and food and wandering crayons. And the light from the front of the house still comes through and plays through the colour in different lines and shapes all day.


And at night, when Tim stays up longer than me (or vice versa) we get our own beautiful stained glass windows, instead of the harsh, direct light from the ceiling.
Last weekend, Tim's folks came and stayed and we all deemed the new layout a great success. We're using our huge backyard more as a big open-plan play room, we loved having a guest room instead of them sleeping on the lounge room floor, and on Sunday morning, when my introverted self needed a break from the 'crowds', I was able to hide away in my girl cave and sew for an hour and regain my sense of self. And I love to be in my large, light bedroom.
Even though this layout is untraditional, I think it's the most suited to our goals and personalities. And it's drawn our attention to what we do have rather than what our house lacks. A bit like what I was talking about here for my Fabric Fast.

I think next up is some brighter fabric art?