
Another quilt on the pre-baby list done! Another one not for us or for baby, but for my oldest friend who turned 30 this month. Slowly but surely I am getting through the list for others (ok, maybe not so slowly, I'm just impatient!) and then I'll spend the last couple of weeks making what I can for the baby. It makes me glad I've been handstitching the hexie quilt for my little one because I'm enjoying working on it each evening.
In my last post, I wrote about taking short cuts to help me get these quilts finished. I bought this Hello Petal Layer cake for my friend's quilt so I could sew it up quickly with minimal cutting and no time choosing colours (even though that's usually my favourite part!) While I was deciding what kind of design to make, I was really drawn to Rachel's Penny Patch quilt and Blue Elephant Stitches' Granny Square Quilt. I love the 2.5" squares in both and I considered for a while adjusting the pattern for either to work with a layer cake. In the end, I just couldn't bare chopping those little girls' heads off and came up with this design to make the most of the mix of basic prints and illustrations.

- Prints I wanted to keep completely intact.
- Prints that could work cut into 4.5" squares, and co-ordinating basics to match each one.
- Prints that would work cut into 2.5" squares and basics to match each one.

First I worked on the pile that would be little postage stamp (2.5" squares) blocks. I cut the first 10" block into 4 x 2.5" strips. Then repeated with the co-ordinating print. This makes two identical blocks.


Cut these into 2.5" strips across the grain.


Sew them back together like the picture above. Continue this method with the rest of that pile of 10" squares.

Then, onto the pile of prints for 4.5" squares. Cut 2 x 4.5" strips from the 10" block. Then cut 4.5" squares from those strips. Repeat with the co-ordinating print and sew 2 identical blocks together like the picture below.


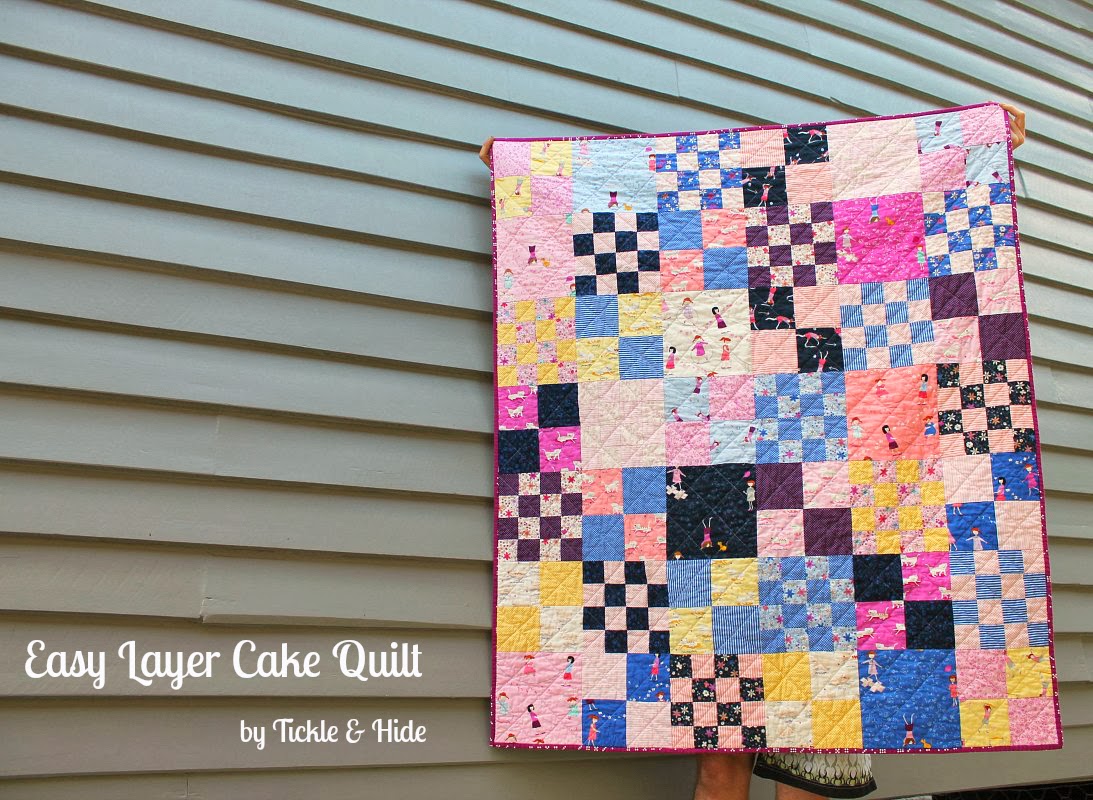
 Once you've sewn/trimmed all your blocks (they should all be 8.5" square), work out your desired layout. I like that this layer cake came with 42 squares, making an easy 6x7 block layout. Sew together in rows, then sew the rows together.


what a great way to use a layer cake! Love it :-)
ReplyDeleteabsolutely love it Jodi. I have a Simply Color Layer Cake and I think I might have just found the pattern for it :-)
ReplyDeleteWhat a great little tutorial, thank you!!
ReplyDeleteSo glad you chose not to cut their little heads off ;-) It looks great!
ReplyDeleteGorgeous Jodi!
ReplyDeleteLove the layout and design! Great idea for a layer cake!
ReplyDeleteWhat a lovely quilt! Thanks so much for this tutorial. I have 12 layer cake blocks remaining from my Briar Rose stack, and they've been haunting me! I'm going to use this (but make it baby quilt size, of course). Thanks so much! (charlottesgraceforacure@gmail.com)
ReplyDeleteThis quilt is beautiful! I love how you adapted the penny patch to work for your fabric selection. I think the backing and quilting are perfect for this quilt!
ReplyDeleteThanks for sharing, love this use of your fabrics!
ReplyDelete